Find the Gym Sessions you need
Burpee: How-to, Guide & Tips
Burpee: How-to, Guide & Tips
Battling Ropes: How-to, Guide & Tips
Battling Ropes: How-to, Guide & Tips
Ski Ergometer: How-to, Guide & Tips
Ski Ergometer: How-to, Guide & Tips
Roll Recumbent Hip External Rotator And Hip Extensor Stretch (crossed Leg): How-to, Guide & Tips
Roll Recumbent Hip External Rotator And Hip Extensor Stretch (crossed Leg): How-to, Guide & Tips
Cat Stretch: How-to, Guide & Tips
Cat Stretch: How-to, Guide & Tips
Roll Hip Thrust: How-to, Guide & Tips
Roll Hip Thrust: How-to, Guide & Tips
Across Chest Shoulder Stretch: How-to, Guide & Tips
Across Chest Shoulder Stretch: How-to, Guide & Tips
Raised Leg Knee Flexor Stretch: How-to, Guide & Tips
Raised Leg Knee Flexor Stretch: How-to, Guide & Tips
Hamstring Stretch: How-to, Guide & Tips
Hamstring Stretch: How-to, Guide & Tips
Shoulder Stretch Behind The Back: How-to, Guide & Tips
Shoulder Stretch Behind The Back: How-to, Guide & Tips
Back Pec Stretch: How-to, Guide & Tips
Back Pec Stretch: How-to, Guide & Tips
Behind Head Chest Stretch: How-to, Guide & Tips
Behind Head Chest Stretch: How-to, Guide & Tips
Chest And Front Of Shoulder Stretch: How-to, Guide & Tips
Chest And Front Of Shoulder Stretch: How-to, Guide & Tips
Standing Quadriceps Stretch: How-to, Guide & Tips
Standing Quadriceps Stretch: How-to, Guide & Tips
Standing One Arm Chest Stretch: How-to, Guide & Tips
Standing One Arm Chest Stretch: How-to, Guide & Tips
Kneeling Hip Flexor Stretch: How-to, Guide & Tips
Kneeling Hip Flexor Stretch: How-to, Guide & Tips
Fixed Bar Back Stretch: How-to, Guide & Tips
Fixed Bar Back Stretch: How-to, Guide & Tips
Standing Lateral Stretch: How-to, Guide & Tips
Standing Lateral Stretch: How-to, Guide & Tips
Standing Hamstring Stretch: How-to, Guide & Tips
Standing Hamstring Stretch: How-to, Guide & Tips
Seated Single Leg Hamstring Stretch: How-to, Guide & Tips
Seated Single Leg Hamstring Stretch: How-to, Guide & Tips
Rear Deltoid Stretch: How-to, Guide & Tips
Rear Deltoid Stretch: How-to, Guide & Tips
Plyo Side Lunge Stretch: How-to, Guide & Tips
Plyo Side Lunge Stretch: How-to, Guide & Tips
Overhead Triceps Stretch: How-to, Guide & Tips
Overhead Triceps Stretch: How-to, Guide & Tips
Standing Reach-Up Back Rotation Stretch: How-to, Guide & Tips
Standing Reach-Up Back Rotation Stretch: How-to, Guide & Tips
Kneeling Lat Stretch: How-to, Guide & Tips
Kneeling Lat Stretch: How-to, Guide & Tips
Shoulder – Medial Rotation (internal Rotation): How-to, Guide & Tips
Shoulder – Medial Rotation (internal Rotation): How-to, Guide & Tips
Shoulder – Transverse Flexion: How-to, Guide & Tips
Shoulder – Transverse Flexion: How-to, Guide & Tips
Glute Bridge Two Legs On Floor: How-to, Guide & Tips
Glute Bridge Two Legs On Floor: How-to, Guide & Tips
Front Plank: How-to, Guide & Tips
Front Plank: How-to, Guide & Tips
Incline Twisting Sit Up: How-to, Guide & Tips
Incline Twisting Sit Up: How-to, Guide & Tips
Weighted Hanging Leg Hip Raise: How-to, Guide & Tips
Weighted Hanging Leg Hip Raise: How-to, Guide & Tips
Hanging Straight Leg Hip Raise: How-to, Guide & Tips
Hanging Straight Leg Hip Raise: How-to, Guide & Tips
Wheel Rollout: How-to, Guide & Tips
Wheel Rollout: How-to, Guide & Tips
Bent Knee Lying Twist: How-to, Guide & Tips
Bent Knee Lying Twist: How-to, Guide & Tips
Bycicle Twisting Crunch: How-to, Guide & Tips
Bycicle Twisting Crunch: How-to, Guide & Tips
Twisted Leg Raise: How-to, Guide & Tips
Twisted Leg Raise: How-to, Guide & Tips
Incline Leg Hip Raise (leg Straight): How-to, Guide & Tips
Incline Leg Hip Raise (leg Straight): How-to, Guide & Tips
Weighted Decline Crunch: How-to, Guide & Tips
Weighted Decline Crunch: How-to, Guide & Tips
Jack Split Crunches: How-to, Guide & Tips
Jack Split Crunches: How-to, Guide & Tips
Crunch Floor: How-to, Guide & Tips
Crunch Floor: How-to, Guide & Tips
Alternate Lying Floor Leg Raise: How-to, Guide & Tips
Alternate Lying Floor Leg Raise: How-to, Guide & Tips
Cocoons: How-to, Guide & Tips
Cocoons: How-to, Guide & Tips
Air Bike: How-to, Guide & Tips
Air Bike: How-to, Guide & Tips
Seated Leg Raise: How-to, Guide & Tips
Seated Leg Raise: How-to, Guide & Tips
Captains Chair Straight Leg Raise: How-to, Guide & Tips
Captains Chair Straight Leg Raise: How-to, Guide & Tips
Russian Twist Chop: How-to, Guide & Tips
Russian Twist Chop: How-to, Guide & Tips
3/4 Sit-Up: How-to, Guide & Tips
3/4 Sit-Up: How-to, Guide & Tips
Band Twist: How-to, Guide & Tips
Band Twist: How-to, Guide & Tips
Band Twist (up Down): How-to, Guide & Tips
Band Twist (up Down): How-to, Guide & Tips
Band Twist (down Up): How-to, Guide & Tips
Band Twist (down Up): How-to, Guide & Tips
Band Lying Leg And Hip Raise: How-to, Guide & Tips
Band Lying Leg And Hip Raise: How-to, Guide & Tips
Band Kneeling Crunch: How-to, Guide & Tips
Band Kneeling Crunch: How-to, Guide & Tips
Lever Total Abdominal Crunch: How-to, Guide & Tips
Lever Total Abdominal Crunch: How-to, Guide & Tips
Lever Ab Coaster Crunch: How-to, Guide & Tips
Lever Ab Coaster Crunch: How-to, Guide & Tips
Lever Kneeling Twist: How-to, Guide & Tips
Lever Kneeling Twist: How-to, Guide & Tips
Lever Seated Crunch (chest Pad): How-to, Guide & Tips
Lever Seated Crunch (chest Pad): How-to, Guide & Tips
Smith Hip Raise: How-to, Guide & Tips
Smith Hip Raise: How-to, Guide & Tips
Cable Standing Crunch (with Rope Attachment): How-to, Guide & Tips
Cable Standing Crunch (with Rope Attachment): How-to, Guide & Tips
Cable Twist: How-to, Guide & Tips
Cable Twist: How-to, Guide & Tips
Cable Kneeling Crunch: How-to, Guide & Tips
Cable Kneeling Crunch: How-to, Guide & Tips
Glute Ham Single Leg Hyperextension: How-to, Guide & Tips
Glute Ham Single Leg Hyperextension: How-to, Guide & Tips
Bent Leg Kickback (kneeling): How-to, Guide & Tips
Bent Leg Kickback (kneeling): How-to, Guide & Tips
Band Clam: How-to, Guide & Tips
Band Clam: How-to, Guide & Tips
Band Pull Through: How-to, Guide & Tips
Band Pull Through: How-to, Guide & Tips
Band Bent Over Hip Extension: How-to, Guide & Tips
Band Bent Over Hip Extension: How-to, Guide & Tips
Band Kneeling Rear Kick: How-to, Guide & Tips
Band Kneeling Rear Kick: How-to, Guide & Tips
Lever Side Hip Abduction: How-to, Guide & Tips
Lever Side Hip Abduction: How-to, Guide & Tips
Lever Hip Extension: How-to, Guide & Tips
Lever Hip Extension: How-to, Guide & Tips
Lever Hip Thrust: How-to, Guide & Tips
Lever Hip Thrust: How-to, Guide & Tips
Lever Standing Rear Kick: How-to, Guide & Tips
Lever Standing Rear Kick: How-to, Guide & Tips
Lever Reverse Vertical Hack Squat: How-to, Guide & Tips
Lever Reverse Vertical Hack Squat: How-to, Guide & Tips
Smith Stiff Legged Deadlift: How-to, Guide & Tips
Smith Stiff Legged Deadlift: How-to, Guide & Tips
Smith Bent Knee Good Morning: How-to, Guide & Tips
Smith Bent Knee Good Morning: How-to, Guide & Tips
Smith Kneeling Rear Kick: How-to, Guide & Tips
Smith Kneeling Rear Kick: How-to, Guide & Tips
Smith Hip Thrust: How-to, Guide & Tips
Smith Hip Thrust: How-to, Guide & Tips
Lever Hip Thrust (plate Loaded): How-to, Guide & Tips
Lever Hip Thrust (plate Loaded): How-to, Guide & Tips
Cable Hip Adduction: How-to, Guide & Tips
Cable Hip Adduction: How-to, Guide & Tips
Cable Hip Abduction: How-to, Guide & Tips
Cable Hip Abduction: How-to, Guide & Tips
Cable Standing Hip Extension: How-to, Guide & Tips
Cable Standing Hip Extension: How-to, Guide & Tips
Cable Donkey Kickback: How-to, Guide & Tips
Cable Donkey Kickback: How-to, Guide & Tips
Cable Pull Through: How-to, Guide & Tips
Cable Pull Through: How-to, Guide & Tips
Dumbbell Step-Up: How-to, Guide & Tips
Dumbbell Step-Up: How-to, Guide & Tips
Dumbbell Single Leg Deadlift: How-to, Guide & Tips
Dumbbell Single Leg Deadlift: How-to, Guide & Tips
Dumbbell Single Leg Glute Bridge: How-to, Guide & Tips
Dumbbell Single Leg Glute Bridge: How-to, Guide & Tips
Dumbbell Glute Bridge: How-to, Guide & Tips
Dumbbell Glute Bridge: How-to, Guide & Tips
Barbell Step Up: How-to, Guide & Tips
Barbell Step Up: How-to, Guide & Tips
Landmine Romanian Deadlift: How-to, Guide & Tips
Landmine Romanian Deadlift: How-to, Guide & Tips
Landmine Sumo Squat: How-to, Guide & Tips
Landmine Sumo Squat: How-to, Guide & Tips
Barbell Glute Bridge (hands On Bar): How-to, Guide & Tips
Barbell Glute Bridge (hands On Bar): How-to, Guide & Tips
Barbell Hip Thrust: How-to, Guide & Tips
Barbell Hip Thrust: How-to, Guide & Tips
Barbell Good Morning: How-to, Guide & Tips
Barbell Good Morning: How-to, Guide & Tips
Cable Wrist Curl: How-to, Guide & Tips
Cable Wrist Curl: How-to, Guide & Tips
Dumbbell Seated Neutral Wrist Curl: How-to, Guide & Tips
Dumbbell Seated Neutral Wrist Curl: How-to, Guide & Tips
Dumbbell One Arm Wrist Curl: How-to, Guide & Tips
Dumbbell One Arm Wrist Curl: How-to, Guide & Tips
Dumbbell One Arm Revers Wrist Curl: How-to, Guide & Tips
Dumbbell One Arm Revers Wrist Curl: How-to, Guide & Tips
Weighted Standing Curl: How-to, Guide & Tips
Weighted Standing Curl: How-to, Guide & Tips
Barbell Standing Back Wrist Curl: How-to, Guide & Tips
Barbell Standing Back Wrist Curl: How-to, Guide & Tips
Barbell Palms Down Wrist Curl Over A Bench: How-to, Guide & Tips
Barbell Palms Down Wrist Curl Over A Bench: How-to, Guide & Tips
EZ Barbell Reverse Grip Curl: How-to, Guide & Tips
EZ Barbell Reverse Grip Curl: How-to, Guide & Tips
Barbell Revers Wrist Curl: How-to, Guide & Tips
Barbell Revers Wrist Curl: How-to, Guide & Tips
Sled 45 Calf Press: How-to, Guide & Tips
Sled 45 Calf Press: How-to, Guide & Tips
Lever Standing Calf Raise: How-to, Guide & Tips
Lever Standing Calf Raise: How-to, Guide & Tips
Lever Seated Calf Raise (plate Loaded): How-to, Guide & Tips
Lever Seated Calf Raise (plate Loaded): How-to, Guide & Tips
Smith Calf Raise: How-to, Guide & Tips
Smith Calf Raise: How-to, Guide & Tips
Dumbbell Standing Calf Raise: How-to, Guide & Tips
Dumbbell Standing Calf Raise: How-to, Guide & Tips
Barbell Seated Calf Raise: How-to, Guide & Tips
Barbell Seated Calf Raise: How-to, Guide & Tips
Bench Dip (knees Bent): How-to, Guide & Tips
Bench Dip (knees Bent): How-to, Guide & Tips
Triceps Press (head Below Bench): How-to, Guide & Tips
Triceps Press (head Below Bench): How-to, Guide & Tips
Triceps Dip (bench Leg): How-to, Guide & Tips
Triceps Dip (bench Leg): How-to, Guide & Tips
Bench Dip On Floor: How-to, Guide & Tips
Bench Dip On Floor: How-to, Guide & Tips
Close Grip Push Up: How-to, Guide & Tips
Close Grip Push Up: How-to, Guide & Tips
Band Pushdown: How-to, Guide & Tips
Band Pushdown: How-to, Guide & Tips
Band Side Triceps Extension: How-to, Guide & Tips
Band Side Triceps Extension: How-to, Guide & Tips
Band Overhead Triceps Extension: How-to, Guide & Tips
Band Overhead Triceps Extension: How-to, Guide & Tips
Band Skull Crusher: How-to, Guide & Tips
Band Skull Crusher: How-to, Guide & Tips
Lever Triceps Extension: How-to, Guide & Tips
Lever Triceps Extension: How-to, Guide & Tips
Lever Triceps Dip (plate Loaded): How-to, Guide & Tips
Lever Triceps Dip (plate Loaded): How-to, Guide & Tips
Cable High Pulley Overhead Tricep Extension: How-to, Guide & Tips
Cable High Pulley Overhead Tricep Extension: How-to, Guide & Tips
Cable Reverse Grip Triceps Pushdown (SZ-Bar): How-to, Guide & Tips
Cable Reverse Grip Triceps Pushdown (SZ-Bar): How-to, Guide & Tips
Cable Kickback: How-to, Guide & Tips
Cable Kickback: How-to, Guide & Tips
Cable Pushdown: How-to, Guide & Tips
Cable Pushdown: How-to, Guide & Tips
Cable Triceps Pushdown (V Bar Attachment): How-to, Guide & Tips
Cable Triceps Pushdown (V Bar Attachment): How-to, Guide & Tips
Cable Overhead Kneeling Triceps Extension: How-to, Guide & Tips
Cable Overhead Kneeling Triceps Extension: How-to, Guide & Tips
Cable Overhead Triceps Extension (rope Attachment): How-to, Guide & Tips
Cable Overhead Triceps Extension (rope Attachment): How-to, Guide & Tips
Cable Kneeling Triceps Extension: How-to, Guide & Tips
Cable Kneeling Triceps Extension: How-to, Guide & Tips
Cable Pushdown (with Rope Attachment): How-to, Guide & Tips
Cable Pushdown (with Rope Attachment): How-to, Guide & Tips
Dumbbell Kickback: How-to, Guide & Tips
Dumbbell Kickback: How-to, Guide & Tips
Dumbbell Standing Kickback: How-to, Guide & Tips
Dumbbell Standing Kickback: How-to, Guide & Tips
Dumbbell Lying Floor Skullcrusher: How-to, Guide & Tips
Dumbbell Lying Floor Skullcrusher: How-to, Guide & Tips
Dumbbell Decline Triceps Extension: How-to, Guide & Tips
Dumbbell Decline Triceps Extension: How-to, Guide & Tips
Dumbbell Standing One Arm Extension: How-to, Guide & Tips
Dumbbell Standing One Arm Extension: How-to, Guide & Tips
Dumbbell Standing Triceps Extension: How-to, Guide & Tips
Dumbbell Standing Triceps Extension: How-to, Guide & Tips
Barbell Lying Extension: How-to, Guide & Tips
Barbell Lying Extension: How-to, Guide & Tips
Barbell JM Bench Press: How-to, Guide & Tips
Barbell JM Bench Press: How-to, Guide & Tips
Barbell Lying Close Grip Press: How-to, Guide & Tips
Barbell Lying Close Grip Press: How-to, Guide & Tips
Barbell Seated Overhead Triceps Extension: How-to, Guide & Tips
Barbell Seated Overhead Triceps Extension: How-to, Guide & Tips
Band Seated Biceps Curl: How-to, Guide & Tips
Band Seated Biceps Curl: How-to, Guide & Tips
Alternate Biceps Curl (with Band): How-to, Guide & Tips
Alternate Biceps Curl (with Band): How-to, Guide & Tips
Band Concentration Curl: How-to, Guide & Tips
Band Concentration Curl: How-to, Guide & Tips
Band One Arm Overhead Biceps Curl: How-to, Guide & Tips
Band One Arm Overhead Biceps Curl: How-to, Guide & Tips
Suspender Arm Curl: How-to, Guide & Tips
Suspender Arm Curl: How-to, Guide & Tips
Lever Biceps Curl: How-to, Guide & Tips
Lever Biceps Curl: How-to, Guide & Tips
Lever Preacher Curl: How-to, Guide & Tips
Lever Preacher Curl: How-to, Guide & Tips
Machine Curl: How-to, Guide & Tips
Machine Curl: How-to, Guide & Tips
Cable One Arm Biceps Curl: How-to, Guide & Tips
Cable One Arm Biceps Curl: How-to, Guide & Tips
Cable Curl: How-to, Guide & Tips
Cable Curl: How-to, Guide & Tips
Cable Reverse Curl: How-to, Guide & Tips
Cable Reverse Curl: How-to, Guide & Tips
Cable Hammer Curl: How-to, Guide & Tips
Cable Hammer Curl: How-to, Guide & Tips
Dumbbell Prone Incline Curl: How-to, Guide & Tips
Dumbbell Prone Incline Curl: How-to, Guide & Tips
Dumbbell Incline Hammer Curl: How-to, Guide & Tips
Dumbbell Incline Hammer Curl: How-to, Guide & Tips
Dumbbell Incline Biceps Curl: How-to, Guide & Tips
Dumbbell Incline Biceps Curl: How-to, Guide & Tips
Dumbbell Concentration Curl: How-to, Guide & Tips
Dumbbell Concentration Curl: How-to, Guide & Tips
Dumbbell Hammer Curl: How-to, Guide & Tips
Dumbbell Hammer Curl: How-to, Guide & Tips
Dumbbell Peacher Hammer Curl: How-to, Guide & Tips
Dumbbell Peacher Hammer Curl: How-to, Guide & Tips
Dumbbell Seated Curl: How-to, Guide & Tips
Dumbbell Seated Curl: How-to, Guide & Tips
Dumbbell Alternate Biceps Curl: How-to, Guide & Tips
Dumbbell Alternate Biceps Curl: How-to, Guide & Tips
Dumbbell Preacher Curl: How-to, Guide & Tips
Dumbbell Preacher Curl: How-to, Guide & Tips
Dumbbell Standing Preacher Curl: How-to, Guide & Tips
Dumbbell Standing Preacher Curl: How-to, Guide & Tips
Dumbbell Biceps Curl: How-to, Guide & Tips
Dumbbell Biceps Curl: How-to, Guide & Tips
EZ Barbell Curl: How-to, Guide & Tips
EZ Barbell Curl: How-to, Guide & Tips
Barbell Seated Close Grip Concentration Curl: How-to, Guide & Tips
Barbell Seated Close Grip Concentration Curl: How-to, Guide & Tips
Barbell Standing Wide Grip Curl: How-to, Guide & Tips
Barbell Standing Wide Grip Curl: How-to, Guide & Tips
Barbell Reverse Curl: How-to, Guide & Tips
Barbell Reverse Curl: How-to, Guide & Tips
Ez Barbell Standing Preacher Curl: How-to, Guide & Tips
Ez Barbell Standing Preacher Curl: How-to, Guide & Tips
Barbell Preacher Curl: How-to, Guide & Tips
Barbell Preacher Curl: How-to, Guide & Tips
Band Shrug: How-to, Guide & Tips
Band Shrug: How-to, Guide & Tips
Lever Shrug (bench Press Machine): How-to, Guide & Tips
Lever Shrug (bench Press Machine): How-to, Guide & Tips
Lever Shrug (plate Loaded): How-to, Guide & Tips
Lever Shrug (plate Loaded): How-to, Guide & Tips
Lever Gripless Shrug: How-to, Guide & Tips
Lever Gripless Shrug: How-to, Guide & Tips
Smith Back Shrug: How-to, Guide & Tips
Smith Back Shrug: How-to, Guide & Tips
Smith Shrug: How-to, Guide & Tips
Smith Shrug: How-to, Guide & Tips
Cable Shrug: How-to, Guide & Tips
Cable Shrug: How-to, Guide & Tips
Dumbbell Shrug: How-to, Guide & Tips
Dumbbell Shrug: How-to, Guide & Tips
Dumbbell Incline Shrug: How-to, Guide & Tips
Dumbbell Incline Shrug: How-to, Guide & Tips
Dumbbell Decline Shrug: How-to, Guide & Tips
Dumbbell Decline Shrug: How-to, Guide & Tips
Barbell Overhead Shrug: How-to, Guide & Tips
Barbell Overhead Shrug: How-to, Guide & Tips
Barbell Shrug: How-to, Guide & Tips
Barbell Shrug: How-to, Guide & Tips
Handstand Push Up: How-to, Guide & Tips
Handstand Push Up: How-to, Guide & Tips
Wall-Supported Handstand Push Up: How-to, Guide & Tips
Wall-Supported Handstand Push Up: How-to, Guide & Tips
Band Rear Delt Row: How-to, Guide & Tips
Band Rear Delt Row: How-to, Guide & Tips
Band Standing External Shoulder Rotation: How-to, Guide & Tips
Band Standing External Shoulder Rotation: How-to, Guide & Tips
Band Upright Row (under Two Feet): How-to, Guide & Tips
Band Upright Row (under Two Feet): How-to, Guide & Tips
Band Lateral Raise: How-to, Guide & Tips
Band Lateral Raise: How-to, Guide & Tips
Standing Lateral Raise (with Band): How-to, Guide & Tips
Standing Lateral Raise (with Band): How-to, Guide & Tips
Shoulder Press (with Band): How-to, Guide & Tips
Shoulder Press (with Band): How-to, Guide & Tips
Band Seated Shoulder Press: How-to, Guide & Tips
Band Seated Shoulder Press: How-to, Guide & Tips
Band Standing Rear Delt Row: How-to, Guide & Tips
Band Standing Rear Delt Row: How-to, Guide & Tips
Lever Seated Reverse Fly: How-to, Guide & Tips
Lever Seated Reverse Fly: How-to, Guide & Tips
Lever Lateral Raise: How-to, Guide & Tips
Lever Lateral Raise: How-to, Guide & Tips
Smith Seated Shoulder Press: How-to, Guide & Tips
Smith Seated Shoulder Press: How-to, Guide & Tips
Lever Military Press: How-to, Guide & Tips
Lever Military Press: How-to, Guide & Tips
Cable Standing Rear Delt Row (with Rope): How-to, Guide & Tips
Cable Standing Rear Delt Row (with Rope): How-to, Guide & Tips
Cable One Arm Lateral Raise: How-to, Guide & Tips
Cable One Arm Lateral Raise: How-to, Guide & Tips
Cable Lateral Raise: How-to, Guide & Tips
Cable Lateral Raise: How-to, Guide & Tips
Cable Seated Rear Lateral Raise: How-to, Guide & Tips
Cable Seated Rear Lateral Raise: How-to, Guide & Tips
Cable Front Raise: How-to, Guide & Tips
Cable Front Raise: How-to, Guide & Tips
Cable Cross Over Revers Fly: How-to, Guide & Tips
Cable Cross Over Revers Fly: How-to, Guide & Tips
Dumbbell Upright Row: How-to, Guide & Tips
Dumbbell Upright Row: How-to, Guide & Tips
Dumbbell Rear Delt Row: How-to, Guide & Tips
Dumbbell Rear Delt Row: How-to, Guide & Tips
Dumbbell Rear Lateral Raise: How-to, Guide & Tips
Dumbbell Rear Lateral Raise: How-to, Guide & Tips
Dumbbell Front Raise: How-to, Guide & Tips
Dumbbell Front Raise: How-to, Guide & Tips
Dumbbell Rear Fly: How-to, Guide & Tips
Dumbbell Rear Fly: How-to, Guide & Tips
Dumbbell Incline One Arm Lateral Raise: How-to, Guide & Tips
Dumbbell Incline One Arm Lateral Raise: How-to, Guide & Tips
Dumbbell Lateral Raise: How-to, Guide & Tips
Dumbbell Lateral Raise: How-to, Guide & Tips
Dumbbell Alternate Shoulder Press: How-to, Guide & Tips
Dumbbell Alternate Shoulder Press: How-to, Guide & Tips
Dumbbell Arnold Press: How-to, Guide & Tips
Dumbbell Arnold Press: How-to, Guide & Tips
Dumbbell Cuban Press: How-to, Guide & Tips
Dumbbell Cuban Press: How-to, Guide & Tips
Dumbbell Scott Press: How-to, Guide & Tips
Dumbbell Scott Press: How-to, Guide & Tips
Dumbbell Seated Shoulder Press: How-to, Guide & Tips
Dumbbell Seated Shoulder Press: How-to, Guide & Tips
Barbell Bent Over Wide Grip Row: How-to, Guide & Tips
Barbell Bent Over Wide Grip Row: How-to, Guide & Tips
Barbell Seated Military Press (inside Squat Cage): How-to, Guide & Tips
Barbell Seated Military Press (inside Squat Cage): How-to, Guide & Tips
Barbell Standing Bradford Press: How-to, Guide & Tips
Barbell Standing Bradford Press: How-to, Guide & Tips
Barbell Standing Military Press (without Rack): How-to, Guide & Tips
Barbell Standing Military Press (without Rack): How-to, Guide & Tips
Weighted Front Raise: How-to, Guide & Tips
Weighted Front Raise: How-to, Guide & Tips

Weighted Round Arm: How-to, Guide & Tips
Weighted Round Arm: How-to, Guide & Tips
Barbell Upright Row: How-to, Guide & Tips
Barbell Upright Row: How-to, Guide & Tips
Barbell Front Raise: How-to, Guide & Tips
Barbell Front Raise: How-to, Guide & Tips
Barbell Snatch: How-to, Guide & Tips
Barbell Snatch: How-to, Guide & Tips
Trap Bar Deadlift: How-to, Guide & Tips
Trap Bar Deadlift: How-to, Guide & Tips

Jump Split: How-to, Guide & Tips
Jump Split: How-to, Guide & Tips
Inverse Leg Curl: How-to, Guide & Tips
Inverse Leg Curl: How-to, Guide & Tips

Single Leg Squat (pistol): How-to, Guide & Tips
Single Leg Squat (pistol): How-to, Guide & Tips
One Leg Squat: How-to, Guide & Tips
One Leg Squat: How-to, Guide & Tips
Reverse Lunge (leg Kick): How-to, Guide & Tips
Reverse Lunge (leg Kick): How-to, Guide & Tips
Squat: How-to, Guide & Tips
Squat: How-to, Guide & Tips
Jump Squat: How-to, Guide & Tips
Jump Squat: How-to, Guide & Tips
Band Duck Walk: How-to, Guide & Tips
Band Duck Walk: How-to, Guide & Tips
Band Lying Abduction: How-to, Guide & Tips
Band Lying Abduction: How-to, Guide & Tips
Band Lateral Walk: How-to, Guide & Tips
Band Lateral Walk: How-to, Guide & Tips
Band Seated Hip Abduction: How-to, Guide & Tips
Band Seated Hip Abduction: How-to, Guide & Tips
Band Single Leg Split Squat: How-to, Guide & Tips
Band Single Leg Split Squat: How-to, Guide & Tips
Band Squat: How-to, Guide & Tips
Band Squat: How-to, Guide & Tips
Band Lunge: How-to, Guide & Tips
Band Lunge: How-to, Guide & Tips
Band Leg Curl: How-to, Guide & Tips
Band Leg Curl: How-to, Guide & Tips
Band Supine Hip Bridge March: How-to, Guide & Tips
Band Supine Hip Bridge March: How-to, Guide & Tips
Band Plank March: How-to, Guide & Tips
Band Plank March: How-to, Guide & Tips
Band Hip Abduction: How-to, Guide & Tips
Band Hip Abduction: How-to, Guide & Tips
Band Hip Adduction: How-to, Guide & Tips
Band Hip Adduction: How-to, Guide & Tips
Band Standing Leg Extension: How-to, Guide & Tips
Band Standing Leg Extension: How-to, Guide & Tips
Band Lying Leg Curl: How-to, Guide & Tips
Band Lying Leg Curl: How-to, Guide & Tips
Band Lunges: How-to, Guide & Tips
Band Lunges: How-to, Guide & Tips

Band Leg Lift: How-to, Guide & Tips
Band Leg Lift: How-to, Guide & Tips
Lever Belt Squat: How-to, Guide & Tips
Lever Belt Squat: How-to, Guide & Tips
Lever Seated Hip Adduction: How-to, Guide & Tips
Lever Seated Hip Adduction: How-to, Guide & Tips
Lever Seated Hip Abduction: How-to, Guide & Tips
Lever Seated Hip Abduction: How-to, Guide & Tips
Lever Squat (plate Loaded): How-to, Guide & Tips
Lever Squat (plate Loaded): How-to, Guide & Tips
Lever Seated Leg Press: How-to, Guide & Tips
Lever Seated Leg Press: How-to, Guide & Tips

Sled 45Ø Narrow Stance Leg Press: How-to, Guide & Tips
Sled 45Ø Narrow Stance Leg Press: How-to, Guide & Tips
Lever Leg Extension: How-to, Guide & Tips
Lever Leg Extension: How-to, Guide & Tips
Lever Kneeling Leg Curl: How-to, Guide & Tips
Lever Kneeling Leg Curl: How-to, Guide & Tips
Lever Seated Leg Curl: How-to, Guide & Tips
Lever Seated Leg Curl: How-to, Guide & Tips
Lever Lying Leg Curl: How-to, Guide & Tips
Lever Lying Leg Curl: How-to, Guide & Tips
Lever Deadlift: How-to, Guide & Tips
Lever Deadlift: How-to, Guide & Tips
Sled Hack Squat: How-to, Guide & Tips
Sled Hack Squat: How-to, Guide & Tips
Smith Deadlift: How-to, Guide & Tips
Smith Deadlift: How-to, Guide & Tips
Smith Chair Squat: How-to, Guide & Tips
Smith Chair Squat: How-to, Guide & Tips
Smith Single Leg Split Squat: How-to, Guide & Tips
Smith Single Leg Split Squat: How-to, Guide & Tips
Smith Low Bar Squat: How-to, Guide & Tips
Smith Low Bar Squat: How-to, Guide & Tips
Smith Sprint Lunge: How-to, Guide & Tips
Smith Sprint Lunge: How-to, Guide & Tips
Dumbbell Plyo Squat: How-to, Guide & Tips
Dumbbell Plyo Squat: How-to, Guide & Tips
Dumbbell One Leg Squat: How-to, Guide & Tips
Dumbbell One Leg Squat: How-to, Guide & Tips
Dumbbell Rear Lunge: How-to, Guide & Tips
Dumbbell Rear Lunge: How-to, Guide & Tips
Dumbbell Lunge: How-to, Guide & Tips
Dumbbell Lunge: How-to, Guide & Tips
Dumbbell Stiff Leg Deadlift: How-to, Guide & Tips
Dumbbell Stiff Leg Deadlift: How-to, Guide & Tips
Dumbbell Lying Hamstring Curl: How-to, Guide & Tips
Dumbbell Lying Hamstring Curl: How-to, Guide & Tips
Dumbbell Front Squat: How-to, Guide & Tips
Dumbbell Front Squat: How-to, Guide & Tips
Dumbbell Goblet Squat: How-to, Guide & Tips
Dumbbell Goblet Squat: How-to, Guide & Tips
Dumbbell Squat: How-to, Guide & Tips
Dumbbell Squat: How-to, Guide & Tips
Dumbbell Romanian Deadlift: How-to, Guide & Tips
Dumbbell Romanian Deadlift: How-to, Guide & Tips
Dumbbell Biceps Curl Squat: How-to, Guide & Tips
Dumbbell Biceps Curl Squat: How-to, Guide & Tips
Barbell Lunge: How-to, Guide & Tips
Barbell Lunge: How-to, Guide & Tips
Barbell One Leg Squat: How-to, Guide & Tips
Barbell One Leg Squat: How-to, Guide & Tips
Barbell Stiff Legged Deadlift: How-to, Guide & Tips
Barbell Stiff Legged Deadlift: How-to, Guide & Tips
Barbell Jefferson Squat: How-to, Guide & Tips
Barbell Jefferson Squat: How-to, Guide & Tips
Power Clean: How-to, Guide & Tips
Power Clean: How-to, Guide & Tips
Barbell Sumo Romanian Deadlift: How-to, Guide & Tips
Barbell Sumo Romanian Deadlift: How-to, Guide & Tips
Barbell Sumo Deadlift: How-to, Guide & Tips
Barbell Sumo Deadlift: How-to, Guide & Tips
Barbell Deadlift: How-to, Guide & Tips
Barbell Deadlift: How-to, Guide & Tips
Barbell Hack Squat: How-to, Guide & Tips
Barbell Hack Squat: How-to, Guide & Tips
Barbell Front Squat: How-to, Guide & Tips
Barbell Front Squat: How-to, Guide & Tips
Barbell Full Zercher Squat: How-to, Guide & Tips
Barbell Full Zercher Squat: How-to, Guide & Tips
Barbell Full Squat: How-to, Guide & Tips
Barbell Full Squat: How-to, Guide & Tips
Elbow Lift – Reverse Push-Up: How-to, Guide & Tips
Elbow Lift – Reverse Push-Up: How-to, Guide & Tips
Jumping Pull Up: How-to, Guide & Tips
Jumping Pull Up: How-to, Guide & Tips
45 Degree Hyperextension (arms In Front Of Chest): How-to, Guide & Tips
45 Degree Hyperextension (arms In Front Of Chest): How-to, Guide & Tips
Reverse Grip Pull Up: How-to, Guide & Tips
Reverse Grip Pull Up: How-to, Guide & Tips
Pull Up: How-to, Guide & Tips
Pull Up: How-to, Guide & Tips
Band Bent Over Row: How-to, Guide & Tips
Band Bent Over Row: How-to, Guide & Tips
Band Straight Back Seated Row: How-to, Guide & Tips
Band Straight Back Seated Row: How-to, Guide & Tips
Band Kneeling One Arm Pulldown: How-to, Guide & Tips
Band Kneeling One Arm Pulldown: How-to, Guide & Tips
Band Hyperextension: How-to, Guide & Tips
Band Hyperextension: How-to, Guide & Tips
Band Straight Arm Pulldown: How-to, Guide & Tips
Band Straight Arm Pulldown: How-to, Guide & Tips
Band Kneeling Pulldown: How-to, Guide & Tips
Band Kneeling Pulldown: How-to, Guide & Tips
Band Straight Back Standing Row: How-to, Guide & Tips
Band Straight Back Standing Row: How-to, Guide & Tips
Band Fixed Back Underhand Pulldown: How-to, Guide & Tips
Band Fixed Back Underhand Pulldown: How-to, Guide & Tips
Band Close Grip Pulldown: How-to, Guide & Tips
Band Close Grip Pulldown: How-to, Guide & Tips
Lever Back Extension: How-to, Guide & Tips
Lever Back Extension: How-to, Guide & Tips
Lever Seated Row: How-to, Guide & Tips
Lever Seated Row: How-to, Guide & Tips
Lever Lying T Bar Row: How-to, Guide & Tips
Lever Lying T Bar Row: How-to, Guide & Tips
Assisted Parallel Close Grip Pull Up: How-to, Guide & Tips
Assisted Parallel Close Grip Pull Up: How-to, Guide & Tips
Lever T Bar Row: How-to, Guide & Tips
Lever T Bar Row: How-to, Guide & Tips
Assisted Pull Up: How-to, Guide & Tips
Assisted Pull Up: How-to, Guide & Tips
Lever Front Pulldown: How-to, Guide & Tips
Lever Front Pulldown: How-to, Guide & Tips
Lever Neutral Grip Seated Row: How-to, Guide & Tips
Lever Neutral Grip Seated Row: How-to, Guide & Tips
Lever Pullover: How-to, Guide & Tips
Lever Pullover: How-to, Guide & Tips
Weighted Inverted Row: How-to, Guide & Tips
Weighted Inverted Row: How-to, Guide & Tips
Smith Bent Over Narrow Supinated Grip Row: How-to, Guide & Tips
Smith Bent Over Narrow Supinated Grip Row: How-to, Guide & Tips
Lever Low Row: How-to, Guide & Tips
Lever Low Row: How-to, Guide & Tips
Lever High Row: How-to, Guide & Tips
Lever High Row: How-to, Guide & Tips
Lever Lateral Pulldown: How-to, Guide & Tips
Lever Lateral Pulldown: How-to, Guide & Tips
Twin Handle Parallel Grip Lat Pulldown: How-to, Guide & Tips
Twin Handle Parallel Grip Lat Pulldown: How-to, Guide & Tips

Cable Front Seated Row: How-to, Guide & Tips
Cable Front Seated Row: How-to, Guide & Tips

Cable Seated Row With V Bar: How-to, Guide & Tips
Cable Seated Row With V Bar: How-to, Guide & Tips
Cable Palm Rotational Row: How-to, Guide & Tips
Cable Palm Rotational Row: How-to, Guide & Tips
Band One Arm Twisting Seated Row: How-to, Guide & Tips
Band One Arm Twisting Seated Row: How-to, Guide & Tips
Cable One Arm Lat Pulldown: How-to, Guide & Tips
Cable One Arm Lat Pulldown: How-to, Guide & Tips

Cable Underhand Pulldown: How-to, Guide & Tips
Cable Underhand Pulldown: How-to, Guide & Tips
Cable Seated One Arm Alternate Row: How-to, Guide & Tips
Cable Seated One Arm Alternate Row: How-to, Guide & Tips
Cable Straight Arm Pulldown: How-to, Guide & Tips
Cable Straight Arm Pulldown: How-to, Guide & Tips
Cable Rear Pulldown: How-to, Guide & Tips
Cable Rear Pulldown: How-to, Guide & Tips
Cable Seated High Row (V Bar): How-to, Guide & Tips
Cable Seated High Row (V Bar): How-to, Guide & Tips
Cable Seated Wide Grip Row: How-to, Guide & Tips
Cable Seated Wide Grip Row: How-to, Guide & Tips

Cable Low Seated Row: How-to, Guide & Tips
Cable Low Seated Row: How-to, Guide & Tips
Cable Seated Row: How-to, Guide & Tips
Cable Seated Row: How-to, Guide & Tips
Cable Straight Arm Pulldown (with Rope): How-to, Guide & Tips
Cable Straight Arm Pulldown (with Rope): How-to, Guide & Tips
Cable Reverse Grip Straight Back Seated High Row: How-to, Guide & Tips
Cable Reverse Grip Straight Back Seated High Row: How-to, Guide & Tips
Cable Bar Lateral Pulldown: How-to, Guide & Tips
Cable Bar Lateral Pulldown: How-to, Guide & Tips
Dumbbell Lying Rear Delt Row: How-to, Guide & Tips
Dumbbell Lying Rear Delt Row: How-to, Guide & Tips
Dumbbell One Arm Row (rack Support): How-to, Guide & Tips
Dumbbell One Arm Row (rack Support): How-to, Guide & Tips
Dumbbell Hammer Grip Incline Bench Two Arm Row: How-to, Guide & Tips
Dumbbell Hammer Grip Incline Bench Two Arm Row: How-to, Guide & Tips
Dumbbell Incline Row: How-to, Guide & Tips
Dumbbell Incline Row: How-to, Guide & Tips
Dumbbell Pullover On Floor: How-to, Guide & Tips
Dumbbell Pullover On Floor: How-to, Guide & Tips
Dumbbell Palm Rotational Bent Over Row: How-to, Guide & Tips
Dumbbell Palm Rotational Bent Over Row: How-to, Guide & Tips
Dumbbell Standing Bent Over Row: How-to, Guide & Tips
Dumbbell Standing Bent Over Row: How-to, Guide & Tips
Dumbbell Bent Over Row: How-to, Guide & Tips
Dumbbell Bent Over Row: How-to, Guide & Tips
Barbell Lying Row On Rack: How-to, Guide & Tips
Barbell Lying Row On Rack: How-to, Guide & Tips
Lever Bent Over Row (plate Loaded): How-to, Guide & Tips
Lever Bent Over Row (plate Loaded): How-to, Guide & Tips
Barbell Incline Row: How-to, Guide & Tips
Barbell Incline Row: How-to, Guide & Tips
Barbell Rack Pull: How-to, Guide & Tips
Barbell Rack Pull: How-to, Guide & Tips
Barbell Pendlay Row: How-to, Guide & Tips
Barbell Pendlay Row: How-to, Guide & Tips
Landmine One Arm Bent Over Row: How-to, Guide & Tips
Landmine One Arm Bent Over Row: How-to, Guide & Tips

Barbell Reverse Grip Bent Over Row: How-to, Guide & Tips
Barbell Reverse Grip Bent Over Row: How-to, Guide & Tips
Barbell Bent Over Row: How-to, Guide & Tips
Barbell Bent Over Row: How-to, Guide & Tips
Clap Push Up: How-to, Guide & Tips
Clap Push Up: How-to, Guide & Tips
Single Arm Push Up: How-to, Guide & Tips
Single Arm Push Up: How-to, Guide & Tips
Push Up Medicine Ball: How-to, Guide & Tips
Push Up Medicine Ball: How-to, Guide & Tips
Decline Push Up: How-to, Guide & Tips
Decline Push Up: How-to, Guide & Tips
Incline Push Press: How-to, Guide & Tips
Incline Push Press: How-to, Guide & Tips
Push Up (with Push Up Handles): How-to, Guide & Tips
Push Up (with Push Up Handles): How-to, Guide & Tips
Pike Push Up: How-to, Guide & Tips
Pike Push Up: How-to, Guide & Tips
Elevated Push-Up: How-to, Guide & Tips
Elevated Push-Up: How-to, Guide & Tips
Push Up: How-to, Guide & Tips
Push Up: How-to, Guide & Tips
Chest Dip: How-to, Guide & Tips
Chest Dip: How-to, Guide & Tips
Band Seated Chest Press: How-to, Guide & Tips
Band Seated Chest Press: How-to, Guide & Tips
Band Bench Press: How-to, Guide & Tips
Band Bench Press: How-to, Guide & Tips
Band Standing Chest Press: How-to, Guide & Tips
Band Standing Chest Press: How-to, Guide & Tips
Band Push Up: How-to, Guide & Tips
Band Push Up: How-to, Guide & Tips
Band Middle Fly: How-to, Guide & Tips
Band Middle Fly: How-to, Guide & Tips
Band Low Fly: How-to, Guide & Tips
Band Low Fly: How-to, Guide & Tips
Band High Fly: How-to, Guide & Tips
Band High Fly: How-to, Guide & Tips
Assisted Chest Dip (kneeling): How-to, Guide & Tips
Assisted Chest Dip (kneeling): How-to, Guide & Tips
Lever Pec Deck Fly: How-to, Guide & Tips
Lever Pec Deck Fly: How-to, Guide & Tips
Lever Seated Fly: How-to, Guide & Tips
Lever Seated Fly: How-to, Guide & Tips
Machine Chest Press: How-to, Guide & Tips
Machine Chest Press: How-to, Guide & Tips
Smith Hex Press: How-to, Guide & Tips
Smith Hex Press: How-to, Guide & Tips

Smith Incline Bench Press: How-to, Guide & Tips
Smith Incline Bench Press: How-to, Guide & Tips
Smith Decline Bench Press: How-to, Guide & Tips
Smith Decline Bench Press: How-to, Guide & Tips
Smith Bench Press: How-to, Guide & Tips
Smith Bench Press: How-to, Guide & Tips
Lever Decline Chest Press: How-to, Guide & Tips
Lever Decline Chest Press: How-to, Guide & Tips
Lever Lying Chest Press: How-to, Guide & Tips
Lever Lying Chest Press: How-to, Guide & Tips
Lever Chest Press: How-to, Guide & Tips
Lever Chest Press: How-to, Guide & Tips

Cable Incline Fly: How-to, Guide & Tips
Cable Incline Fly: How-to, Guide & Tips
Cable Low Fly: How-to, Guide & Tips
Cable Low Fly: How-to, Guide & Tips
Cable Lying Fly: How-to, Guide & Tips
Cable Lying Fly: How-to, Guide & Tips
Cable Middle Fly: How-to, Guide & Tips
Cable Middle Fly: How-to, Guide & Tips
Dumbbell Lying Hammer Press: How-to, Guide & Tips
Dumbbell Lying Hammer Press: How-to, Guide & Tips
Dumbbell Lying On Floor Hammer Press: How-to, Guide & Tips
Dumbbell Lying On Floor Hammer Press: How-to, Guide & Tips
Dumbbell Reverse Bench Press: How-to, Guide & Tips
Dumbbell Reverse Bench Press: How-to, Guide & Tips
Dumbbell Incline Fly: How-to, Guide & Tips
Dumbbell Incline Fly: How-to, Guide & Tips
Dumbbell Incline Breeding: How-to, Guide & Tips
Dumbbell Incline Breeding: How-to, Guide & Tips
Dumbbell Around Pullover: How-to, Guide & Tips
Dumbbell Around Pullover: How-to, Guide & Tips
Dumbbell Fly: How-to, Guide & Tips
Dumbbell Fly: How-to, Guide & Tips
Dumbbell Close Grip Press: How-to, Guide & Tips
Dumbbell Close Grip Press: How-to, Guide & Tips
Dumbbell Decline Bench Press: How-to, Guide & Tips
Dumbbell Decline Bench Press: How-to, Guide & Tips
Dumbbell Incline Bench Press: How-to, Guide & Tips
Dumbbell Incline Bench Press: How-to, Guide & Tips
Dumbbell Bench Press: How-to, Guide & Tips
Dumbbell Bench Press: How-to, Guide & Tips
Barbell Floor Chest Press: How-to, Guide & Tips
Barbell Floor Chest Press: How-to, Guide & Tips
Barbell Larsen Press: How-to, Guide & Tips
Barbell Larsen Press: How-to, Guide & Tips
Weighted Svend Press: How-to, Guide & Tips
Weighted Svend Press: How-to, Guide & Tips
Barbell Decline Bench Press: How-to, Guide & Tips
Barbell Decline Bench Press: How-to, Guide & Tips
Barbell Incline Bench Press: How-to, Guide & Tips
Barbell Incline Bench Press: How-to, Guide & Tips
Barbell Wide Bench Press: How-to, Guide & Tips
Barbell Wide Bench Press: How-to, Guide & Tips
Barbell Pause Bench Press: How-to, Guide & Tips
Barbell Pause Bench Press: How-to, Guide & Tips
Barbell Bench Press: How-to, Guide & Tips
Barbell Bench Press: How-to, Guide & Tips
Dead Bug: How-to, Guide & Tips
Dead Bug: How-to, Guide & Tips
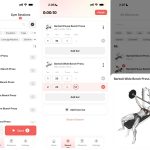
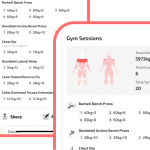
Gym Sessions
Gym Sessions
Protein Calculator
Protein Calculator

Marco Calculator
Marco Calculator
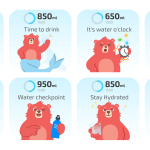
Easy-use Daily Water Intake Calculator
Easy-use Daily Water Intake Calculator
BMR Calculator
BMR Calculator

Calories Calculator App
Calories Calculator App
Exercise Calories Burned Calculator
Exercise Calories Burned Calculator
Walking Time Calculator
Walking Time Calculator

Running and Marathon Pace Calculator
Running and Marathon Pace Calculator
Tools
Tools
Studio activities app for log and motitvation
Studio activities app for log and motitvation
Martial arts app for log and motitvation
Martial arts app for log and motitvation
Snow sports app for log and motitvation
Snow sports app for log and motitvation
Water sports app for log and motitvation
Water sports app for log and motitvation
Ball sports app for log and motitvation
Ball sports app for log and motitvation

Fitness friends sharing and ranking
Fitness friends sharing and ranking

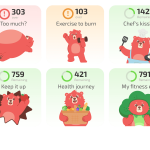
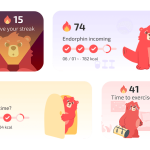
Achievement card
Achievement card
Gym app for log and motitvation
Gym app for log and motitvation
Walking app for log and motivation
Walking app for log and motivation
Cycling app for log and motitvation
Cycling app for log and motitvation
Running app for log and motivation
Running app for log and motivation
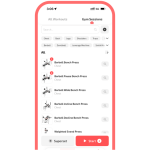
Gym sessions
Gym sessions
Route tracking
Route tracking
Widgets & Watch Faces
Widgets & Watch Faces
Fitness Goals & streak
Fitness Goals & streak
Blog
Blog
Fitness and calorie tracker
Fitness and calorie tracker
FAQ